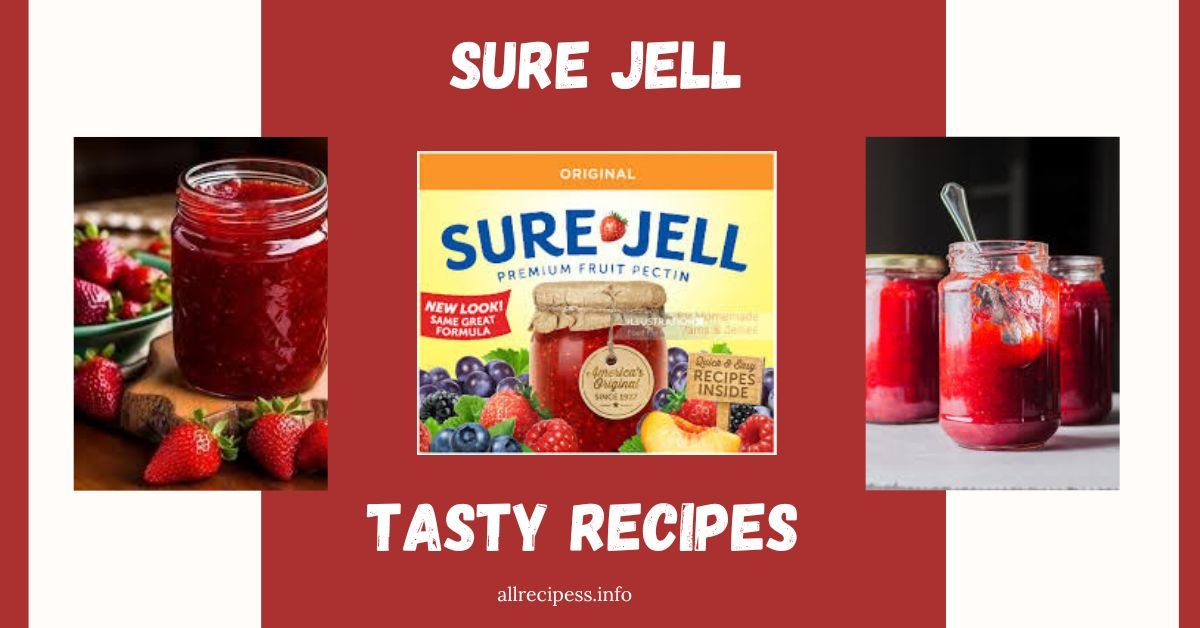
Sure Jell Pectin Review and Tasty Recipes
Making homemade jams and jellies can be fun but sometimes tricky. You might face problems like runny texture or preserves that just don’t set. These issues can make the process stressful, making you wonder if you’ll ever get that perfect jar of jam. Sure Jell Pectin is here to help.
As someone who loves making jams, I can say Sure Jell pectin is a must-have. This high-quality fruit pectin ensures your jams and jellies set perfectly every time, turning your fresh fruit into delicious, reliable spreads easily.
What is Sure-Jell Pectin?
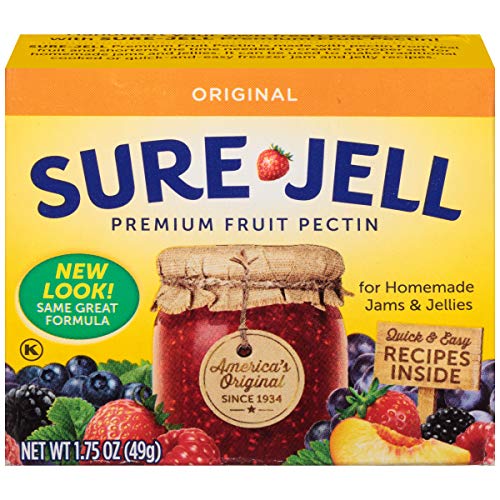
Sure-Jell is a brand of commercial fruit pectin that is widely used in home kitchens for making jams and jellies. Pectin is a natural substance found in fruits that helps them gel and thicken when combined with sugar and acid, making it essential for achieving the desired consistency in jams and jellies.
Made from Natural Fruit Extracts
Sure Jell pectin is derived from natural fruit extracts, typically sourced from apples or citrus fruits. These fruits are known for their high pectin content, which is extracted and processed to create Sure Jell pectin.
Thickening Properties
The primary role of Sure Jell in jam and jelly making is to act as a thickening agent. When combined with fruit, sugar, and acid (usually from lemon juice), Sure Jell pectin helps to form a gel-like texture that is characteristic of jams and jellies. This process ensures that the mixture sets properly and achieves the desired consistency.
Sure Jell Pectin – All Time Best Selling


Importance of Pectin in Jam and Jelly Making
Pectin plays a crucial role in the art of making jams and jellies, ensuring they set properly and achieve the perfect texture. Here’s why pectin is so important:
Role of Pectin
Pectin is a natural substance found in various fruits, especially in their skins, seeds, and cores. When heated together with sugar and acid (typically from lemon juice), pectin forms a gel network that gives jams and jellies their characteristic firmness and structure.
Providing the Desired Texture and Consistency
The primary function of pectin in jam and jelly making is to act as a gelling agent. It interacts with sugar and acid under specific conditions (such as boiling) to create a gel structure. This gel traps the fruit pieces and liquid within it, transforming the mixture from a liquid state into a spreadable consistency.
Ensuring Proper Setting
Without sufficient pectin, jams and jellies may not set properly and can end up too runny or syrupy. On the other hand, using the right amount of pectin ensures that the mixture thickens adequately during cooking and sets into a stable, spreadable product once cooled.
Sure Jell Recipes
Essential Ingredients and Tools
Ingredients
- Sure Jell pectin
- Fresh fruits (strawberries, raspberries, blueberries, etc.)
- Granulated sugar
- Lemon juice (if required by the recipe)
- Water
Tools
- Large pot Check Price
- Canning jars and lids Check Price
- Jar lifter Check Price
- Funnel Check Price
- Potato masher Check Price
- Ladle Check Price
- Measuring cups and spoons Check Price
Basic Principles of Jam and Jelly Making
Making jam and jelly is a rewarding culinary pursuit that relies on a few key principles to achieve delicious results.
1. Pectin and Its Role
Pectin is a natural carbohydrate (polysaccharide) found in varying concentrations in fruits, particularly in their skins, seeds, and cores. It acts as a gelling agent when combined with sugar and acid (usually from lemon juice) under specific conditions, such as heating.
- How it Works: When fruit is cooked with sugar and acid, pectin molecules are activated. They form a network that traps water and fruit solids, resulting in the gel-like consistency characteristic of jams and jellies.
- Sources: Some fruits naturally contain high levels of pectin (e.g., apples, citrus peels), while others are low in pectin and may require added pectin or longer cooking times to achieve a proper set.
2. Understanding Gel Point
- Definition: Gel point refers to the temperature at which the mixture of fruit, sugar, acid, and pectin reaches the desired consistency.
- Science Behind it: As the mixture is heated, water evaporates, and sugars concentrate. Pectin molecules then link together to form a gel network, which thickens the mixture.
- Testing for Gel Point: This is typically determined by testing the mixture’s consistency on a chilled plate or using a thermometer to monitor temperature (usually around 220°F or 105°C at sea level).
3. Sanitization
- Importance: Sterilizing jars, lids, and utensils is crucial to prevent contamination and ensure safe preservation of jams and jellies.
- Process: Wash jars and lids in hot, soapy water, then rinse thoroughly. Sterilize by boiling them in water for 10 minutes or using a dishwasher’s sterilization cycle.
- Preventing Contamination: Cleanliness prevents mold growth and extends shelf life. Hot jams poured into hot, sterile jars reduce the risk of bacteria and spoilage.
Classic Strawberry Jam
Ingredients
- 2 quarts fresh strawberries
- 1 packet Sure Jell pectin
- 7 cups sugar
- 1/2 teaspoon butter (optional to reduce foaming)
Preparation
- Wash and Hull Strawberries: Start by washing the strawberries thoroughly under cold water. Remove the stems and hull them. This step ensures the strawberries are clean and ready for mashing.
- Mash Strawberries: Crush the strawberries using a potato masher or chop them finely with a knife, depending on your preference for chunkiness in the jam.
Cooking
- Combine Ingredients: In a large, heavy-bottomed pot, combine the crushed strawberries with Sure Jell pectin. Mixing the pectin in at this stage ensures it will evenly distribute throughout the jam.
- Bring to a Boil: Place the pot over high heat and bring the strawberry mixture to a rolling boil, stirring constantly to prevent sticking and burning. A rolling boil means the mixture is bubbling vigorously even when stirred.
Adding Sugar
- Incorporate Sugar: Once the mixture is boiling, add all of the sugar at once. Stirring constantly, bring the mixture back to a rolling boil.
- Boil for 1 Minute: Maintain the rolling boil for exactly 1 minute. This short cooking time helps activate the pectin and ensures the jam sets properly.
Skimming Foam
- Remove from Heat: After boiling for 1 minute, remove the pot from the heat. This step prevents overcooking and ensures the jam retains its fresh flavor.
- Skim Foam: Using a metal spoon, skim off any foam that has risen to the surface of the jam. This foam consists of air bubbles and impurities that can affect the jam’s texture.
Canning
- Prepare Jars: Prepare your canning jars by washing them in hot, soapy water and sterilizing them. Keep them warm until ready to fill.
- Fill Jars: Ladle the hot strawberry jam into the prepared jars, leaving about 1/4 inch of space at the top (headspace). Wipe the rims of the jars clean with a damp cloth to ensure a proper seal.
Processing
- Process Jars: Place filled jars into a boiling water canner or large pot with a rack, ensuring the jars are covered with at least 1-2 inches of water. Process them for 10 minutes (adjusting for altitude if necessary).
- Cool and Check Seals: Carefully remove the jars from the canner and place them on a towel-lined counter to cool undisturbed for 12-24 hours. Check the seals by pressing on the center of each lid; a properly sealed lid should not flex.
Raspberry Jelly
Ingredients
- 4 cups raspberry juice (from about 8 cups fresh raspberries)
- 1 packet Sure Jell pectin
- 5 1/2 cups sugar
Juicing Raspberries
- Crush Raspberries: Crush fresh raspberries thoroughly using a potato masher or similar tool. This step helps release the juice from the berries.
- Extract Juice: Strain the crushed raspberries through a jelly bag or cheesecloth to extract the juice. This ensures you get a clear jelly without seeds or pulp.
Cooking Juice and Pectin
- Combine Ingredients: In a large pot, combine the raspberry juice with Sure Jell pectin recipes. Stir well to dissolve the pectin into the juice.
- Bring to a Boil: Over high heat, bring the raspberry juice and pectin mixture to a full rolling boil. Stir constantly to prevent scorching.
Adding Sugar
- Add Sugar: Quickly add all of the sugar to the boiling raspberry juice. Stir continuously to dissolve the sugar completely and evenly distribute it throughout the mixture.
- Boil for 1 Minute: Once all the sugar is added, return the mixture to a full rolling boil. Boil vigorously for exactly 1 minute while stirring constantly to activate the pectin.
Skimming Foam
- Remove from Heat: Remove the pot from the heat as soon as the 1-minute boiling time is complete.
- Skim Foam: Use a metal spoon to skim off any foam that has formed on the surface of the raspberry jelly. Removing the foam improves the clarity and texture of the jelly.
Canning
- Prepare Jars: Prepare your canning jars by washing them thoroughly in hot, soapy water and sterilizing them in boiling water or using a dishwasher’s sterilization cycle.
- Fill Jars: Ladle the hot raspberry jelly into the prepared jars, leaving about 1/4 inch of headspace. Wipe the rims of the jars clean with a damp cloth to ensure a good seal.
Processing
- Process Jars: Place the filled jars into a boiling water canner or large pot with a rack. Ensure the jars are covered with at least 1-2 inches of water. Process for 5 minutes (adjusting for altitude if necessary).
- Cool and Check Seals: Carefully remove the jars from the canner and place them on a towel-lined counter to cool undisturbed for 12-24 hours. Check the seals by pressing on the center of each lid; a properly sealed lid should not flex.
Blueberry Jam
Ingredients
- 4 cups crushed blueberries
- 1 packet Sure Jell pectin
- 2 tablespoons lemon juice
- 5 cups sugar
Preparation
- Crush Blueberries: Crush fresh blueberries to your desired consistency using a potato masher or similar tool. Some prefer a chunkier jam, while others prefer a smoother texture.
Cooking
- Combine Ingredients: In a large pot, combine the crushed blueberries, Sure Jell pectin recipes, and lemon juice. Stir well to mix everything together evenly.
- Bring to a Boil: Over high heat, bring the blueberry mixture to a full rolling boil. Stir constantly to prevent sticking and burning.
Adding Sugar
- Incorporate Sugar: Once the mixture is boiling, add all of the sugar at once. Stir continuously to dissolve the sugar and ensure it is fully incorporated into the blueberry mixture.
- Boil for 1 Minute: After adding the sugar, continue boiling the blueberry jam mixture vigorously for exactly 1 minute. This brief boiling period activates the pectin and ensures the jam will set properly.
Skimming Foam
- Remove from Heat: Remove the pot from the heat as soon as the 1-minute boiling time is complete.
- Skim Foam: Use a metal spoon to skim off any foam that has risen to the surface of the blueberry jam. Removing the foam helps improve the appearance and texture of the finished jam.
Canning
- Prepare Jars: Wash canning jars thoroughly in hot, soapy water, and sterilize them by boiling in water for 10 minutes or using a dishwasher’s sterilization cycle.
- Fill Jars: Ladle the hot blueberry jam into the prepared jars, leaving about 1/4 inch of headspace at the top. Wipe the rims of the jars clean with a damp cloth to ensure a proper seal.
Processing
- Process Jars: Place filled jars into a boiling water canner or large pot with a rack. Ensure the jars are covered with at least 1-2 inches of water. Process for 10 minutes (adjusting for altitude if necessary).
- Cool and Check Seals: Carefully remove the jars from the canner and place them on a towel-lined counter to cool undisturbed for 12-24 hours. Check the seals by pressing on the center of each lid; a properly sealed lid should not flex.
These detailed instructions guide you through each step of making classic strawberry jam, raspberry jelly, and blueberry jam using Sure Jell pectin recipes, ensuring your homemade preserves turn out delicious and perfectly set every time.
Troubleshooting Common Issues
Here’s a detailed explanation of troubleshooting common issues and storage/use tips for homemade jams and jellies:
1. Jam/Jelly Not Setting
Possible Causes
- Insufficient Pectin: Pectin is crucial for jams and jellies to set properly. Some fruits naturally have low pectin levels, requiring the addition of commercial pectin like Sure Jell pectin recipes. If your jam/jelly is too runny, it might be due to not using enough pectin.
- Incorrect Sugar-to-Fruit Ratio: The balance of sugar is critical for proper gelling. Too little sugar can result in a jam that won’t set.
- Undercooking: Not boiling the mixture for long enough can prevent the pectin from activating properly to form a gel.
Tips to Fix
- Re-cook the Mixture: If your jam or jelly is too runny, pour it back into a pot and reheat it. Add more pectin according to the package instructions and bring the mixture to a rolling boil again for 1-2 minutes. Be sure to stir constantly during this process.
- Test for Set: Use the spoon test or plate test to check if your jam/jelly has reached the desired consistency. The mixture should form a gel-like texture when cooled on a chilled plate.
- Adjust Sugar: If the jam/jelly is too runny after re-cooking with additional pectin, you can add more sugar to help it set. Bring the mixture back to a boil and cook for an additional minute if needed.
2. Foaming
Prevention
- Add Butter: Adding a small amount of butter (about 1/2 teaspoon) to the boiling jam/jelly can help reduce foaming by breaking the surface tension.
- Use a Larger Pot: Use a pot with a larger surface area to allow the foam to dissipate more easily during cooking.
- Gentle Stirring: Stir the mixture gently and avoid vigorous stirring, which can incorporate more air and create more foam.
Dealing with Foam
- Skim Off Foam: As the jam/jelly boils, skim off any foam that forms on the surface using a metal spoon. This foam consists of air bubbles and impurities that can affect the clarity and texture of your preserves.
- Cold Water Method: If foam persists, you can sprinkle a few drops of cold water over the surface of the boiling mixture. This can help break up the bubbles and reduce foaming.
3. Jar Sealing Problems
Ensuring a Proper Seal
- Use New Lids: Always use new canning lids for each batch of preserves. Lids should be properly sized and free from dents or damage.
- Clean Jar Rims: Before placing lids on filled jars, wipe the rims clean with a damp cloth to remove any residue. This ensures a good seal.
- Fingertip Tight: Screw the lids on fingertip tight—not too loose and not too tight. This allows for air to escape during processing and creates a vacuum seal after cooling.
If Jars Don’t Seal
- Check Lids: Inspect the lids for any defects or irregularities. Replace with new lids if needed.
- Re-process or Refrigerate: If jars didn’t seal properly, you can reheat the jam/jelly until hot and re-fill new jars with new lids. Process again in a boiling water bath according to the recipe’s instructions. Alternatively, you can refrigerate any jars that didn’t seal properly and consume them within a few weeks.
4. Storage and Usage Tips
Storage
- Cool, Dark Place: Store properly sealed jars of jams and jellies in a cool, dark place such as a pantry or cupboard. Avoid direct sunlight and heat sources, as they can affect the quality and color of the preserves.
- Refrigeration After Opening: Once opened, store jars in the refrigerator. Homemade preserves generally stay fresh for about 3-4 weeks after opening.
Shelf Life
- Expected Shelf Life: Properly canned jams and jellies typically have a shelf life of about 1 year when stored in ideal conditions.
- Check for Spoilage: Regularly inspect jars for signs of mold growth, unusual odors, or changes in texture. Discard any jars that show signs of spoilage to prevent consumption of unsafe food.
Beyond Toast
- Baking: Use jams and jellies as fillings for cakes, cupcakes, and pastries. They add sweetness and fruit flavor to baked goods.
- Cooking: Incorporate jams and jellies into marinades, glazes, and sauces for meats and vegetables. They can add depth of flavor and a touch of sweetness to savory dishes.
- Drinks: Stir jams and jellies into yogurt, oatmeal, or smoothies for added fruit flavor. They can also be used to flavor cocktails, mocktails, and hot beverages.
By following these detailed troubleshooting tips and storage/use recommendations, you can ensure that your homemade jams and jellies turn out perfectly every time.
Frequently Asked Questions
What is Sure-Jell?
Sure-Jell is a brand of commercial fruit pectin widely used in home kitchens for making jams and jellies. It helps jams set properly by thickening the fruit mixture when combined with sugar and acid.
How is Sure-Jell made?
Sure-Jell is made from natural fruit extracts, typically derived from apples or citrus fruits. These extracts are processed to extract pectin, which is then used as a thickening agent in jams and jellies.
Why is pectin important in jam making?
Pectin is crucial because it acts as a gelling agent when heated with sugar and acid, forming a gel-like texture that gives jams and jellies their characteristic set and consistency.
How do I troubleshoot a jam that didn’t set properly?
If your jam is too runny, you can re-cook it with additional Sure-Jell according to package instructions. Be sure to test for set using the spoon or plate test to achieve the desired consistency.
How should I store homemade jams and jellies?
Store properly sealed jars of jams and jellies in a cool, dark place such as a pantry. Once opened, refrigerate and consume within 3-4 weeks for best quality.
Conclusion
Sure-Jell pectin recipes stand out as an invaluable ally in this culinary adventure. As a trusted brand of commercial fruit pectin, Sure-Jell guarantees that your jams and jellies will set flawlessly every time. Derived from natural fruit extracts, typically sourced from apples or citrus fruits known for their pectin content, Sure-Jell provides the essential thickening properties needed to achieve the desired texture and consistency in homemade preserves.
In conclusion, whether you’re a seasoned jam maker or just starting out, Sure-Jell simplifies the process, ensuring your efforts result in consistently delicious jams and jellies that you can enjoy and share with others.